


How to clean cloudy refrigerator plastic bins is a critical maintenance task that directly impacts the visual appeal and hygiene of your kitchen. When your pristine storage components begin to develop a milky, opaque film, it does more than just obscure your view of fresh produce—it signals a degradation of the material itself.
Neglecting this issue can lead to permanent structural vulnerabilities, making it essential to address the root causes immediately. By mastering the techniques required to clean and restore cloudy scratched refrigerator plastic bins safely, homeowners can protect their appliance investment and ensure their food storage environment remains completely sanitary.
Table of Contents
Implementing a structured fridge maintenance routine is about preserving both form and function over an extended lifespan. When clear plastics are allowed to deteriorate, their surfaces become increasingly porous, creating microscopic pockets where bacteria and mold can thrive.
A comprehensive deep-cleaning guide addresses these invisible risks by stripping away embedded organic matter and restoring the smooth, non-porous finish required for optimal food safety. Prioritizing preventative plastic care not only keeps your appliance looking pristine but also prevents the premature, costly replacement of specialized OEM components.
Achieving successful acrylic plastic restoration requires an understanding of how different cleaning agents interact with polymer compounds.
Relying on improper chemical treatments can accelerate hazing, transforming a minor cosmetic issue into permanent structural damage. This guide offers a comprehensive cloudiness troubleshooting framework, detailing how to utilize food-safe cleaning agents alongside precise physical agitation techniques.
From proper microfiber cloth application to advanced scratched surface repair, you will learn how to safely restore polycarbonate clarity while ensuring total chemical damage prevention for long-term durability.

Root Cause Analysis
To understand why clear refrigerator shelving degrades, one must examine the specific vulnerabilities of polymer compounds used in modern appliances.
Most crisper drawers and door bins are engineered from acrylic or polycarbonate plastics, chosen for their high impact resistance and structural clarity. However, these materials lack the inert surface density of glass.
Over time, constant exposure to fluctuating temperatures, high humidity, and localized friction from sliding tracks causes the polymer chains to experience subtle microscopic shifts, kicking off a cycle of surface degradation.
The primary driver of severe opacity is micro-scratching combined with chemical etching. When containers are dragged across the plastic surfaces, they inflict thousands of microscopic abrasions that are invisible individually but collectively scatter light, destroying polycarbonate clarity.
This scratched surface repair issue is compounded when acidic food spills—such as tomato juice, citrus juices, or fermenting dairy—are left to sit on the plastic. These acids chemically attack the polymer bonds, creating a dull, porous texture that traps hard water minerals and cleaning residues, exacerbating the cloudy appearance.
Furthermore, a significant portion of consumer-inflicted damage stems from a lack of chemical damage prevention.
Many homeowners mistakenly use standard glass cleaners, ammonia-based sprays, or highly alkaline detergents to clean their refrigerator interiors. These harsh chemicals strip away the plastic’s UV-protective coatings and cause a phenomenon known as “crazing”—the development of a dense network of micro-cracks just beneath the surface.
Once crazing occurs, the damage cannot be reversed by simple washing, making a specialized approach to acrylic plastic restoration absolutely vital.
By integrating proper preventative plastic care into your standard fridge maintenance routine, you can halt this degradation process mid-track.
This deep-cleaning guide focuses on identifying these chemical and mechanical root causes before they compromise the structural integrity of the bin. Understanding that cloudiness is a combination of embedded mineral scale, micro-abrasions, and chemical film allows you to deploy targeted cloudiness troubleshooting steps.
Using the correct tools ensures that you are actually smoothing out the material rather than scratching it further.
Diagnostic & Staging Phase
Before attempting any restoration work, a strict diagnostic and staging phase must be executed to prepare the plastic for treatment without risking structural failure. The first and most critical step is thermal stabilization.
Refrigerator bins operate in a cold environment, which makes the polymer chains temporarily brittle and highly susceptible to cracking under thermal shock. You must remove all food items, pull the bins completely out of the appliance, and allow them to rest on a flat surface at room temperature for at least 60 to 90 minutes before introducing any liquids.
While the bins are acclimating, gather the specific tools required to execute the process safely. Your staging kit must exclude all abrasive materials, such as green scouring pads, steel wool, or stiff nylon brushes, as these will completely ruin your acrylic plastic restoration efforts.
Instead, assemble several clean towels dedicated specifically to a precise microfiber cloth application. Additionally, ensure you have your chosen food-safe cleaning agents ready, including pure sodium bicarbonate (baking soda) and a mild, additive-free liquid dish soap that contains no artificial dyes or concentrated degreasers.
Next, conduct a physical tactile inspection of the bins to categorize the type of cloudiness you are dealing with—a vital step in your overall cloudiness troubleshooting protocol. Run your fingertips across both the interior and exterior walls of the plastic.
If the surface feels rough or chalky, you are primarily dealing with surface mineral scale or chemical residue buildup. If the surface feels relatively smooth but looks deeply milky under direct light, the cloudiness is likely caused by an accumulation of micro-scratches or structural chemical etching, which will require targeted scratched surface repair steps later on.
Finally, prepare a dedicated, clean workspace that ensures complete chemical damage prevention for surrounding surfaces. A large laundry sink, a clean plastic utility tub, or a towel-lined bathtub is ideal for handling oversized crisper drawers.
Ensure the area is completely free of grit, dust, or debris that could inadvertently scratch the bins during handling. By establishing this controlled environment and following a methodical deep-cleaning guide, you guarantee that your fridge maintenance routine yields professional, crystal-clear results while maintaining perfect polycarbonate clarity.
How to Clean Cloudy Refrigerator Plastic Bins: The Ultimate Step-by-Step Fixing Guide
Step 1: Thermal Stabilization and Preliminary Dry Debris Removal
The first critical phase of execution requires complete thermal stabilization of the compromised components before any liquid touches the surface.
Removing cold plastic drawers from an environment cooled to 37°F and immediately exposing them to warm water creates severe thermal shock, which can cause micro-fractures or catastrophic structural splitting. Place the bins on a soft, level surface and allow them to rest undisturbed for at least 90 minutes until they completely match the room’s ambient temperature.
While waiting, use a clean, dry cloth to gently sweep away loose crumbs, dried organic matter, and food debris, ensuring you do not drag hard particles across the surface, which would create deep scratches requiring extensive scratched surface repair later.
A common mistake during this preliminary phase is utilizing handheld vacuum attachments with stiff bristles to clear out corner dust. These stiff synthetic bristles inflict thousands of microscopic tracks across the polymer surface, instantly destroying any remaining polycarbonate clarity.
Instead, stick to a gentle, unheated compressed air canister or a soft, static-free dusting cloth to safely clear the corners. Look for the visual cue of a completely matte, debris-free surface that feels uniform to the touch before proceeding.
This diligent preparation forms the bedrock of a successful fridge maintenance routine and prevents the accidental grinding of grit into the plastic during subsequent washing stages.
The Warm Dish Soap and Baking Soda Soaking Method
Once the plastic has stabilized completely to room temperature, you can initiate the deep chemical breakdown of the cloudy film. Fill a deep utility sink or a clean bathtub with lukewarm water—never hot—and add 1/2 cup of pure sodium bicarbonate alongside two tablespoons of a mild, scent-free dish soap.
Submerge the cloudy bins completely in this solution, ensuring no air pockets are trapped beneath the shelving channels.
This soaking phase uses mild food-safe cleaning agents to safely emulsify greasy residues, lift stubborn hard water scale, and dissolve superficial films without triggering the surface degradation common with industrial solvents, making it a cornerstone of effective cloudiness troubleshooting.
Allow the components to soak undisturbed for a minimum of 45 minutes to ensure the solution penetrates deep into the pores of the plastic. The biggest error homeowners commit here is rushing the process by using a stiff brush to scrub the bin while submerged, which works against your goals of preventative plastic care.
Instead, let the chemical synergy of the bath lift the grime naturally. You will know the step is working when you observe a slight discoloration or cloudiness transferring from the plastic walls into the surrounding water pool.
This indicates that embedded food oils and mineral films are successfully lifting away, setting the stage for pristine acrylic plastic restoration.
Avoiding Harsh Abrasive Sponges
When the soaking period concludes, drain the basin and prepare for the primary manual agitation phase. You must absolutely avoid green scouring pads, steel wool, or abrasive melamine foam erasers, as these items act like sandpaper on clear acrylic, creating permanent haze and ensuring you will need professional scratched surface repair.
Instead, transition entirely to a dedicated microfiber cloth application. Wet a clean, high-pile microfiber cloth with clean water, fold it into a flat pad to distribute hand pressure evenly, and begin wiping down the plastic walls using long, continuous horizontal strokes rather than circular buffing motions.
The circular motion trap is a frequent mistake that creates highly visible swirl marks when light hits the shelf from above. By wiping in straight, linear paths, you control the pattern of light refraction and preserve the crisp appearance of the bin.
Pay special attention to the corners and structural tracks where grease deposits accumulate most heavily. As a visual cue, check the surface by holding the bin up against a direct light source at an angle; if you see water sheeting evenly off the plastic instead of beading up around sticky patches, the surface film has been completely eradicated, fulfilling a vital step in this deep-cleaning guide.
Micro-Scratch Removal Techniques for Clear Plastic
If the plastic remains hazy after a thorough washing, the cloudiness is being caused by a network of physical micro-abrasions scattering the light. To address this, apply a dime-sized amount of a specialized, non-abrasive polymer polishing compound or a finely milled baking soda paste directly onto a damp cloth.
Execute a precise microfiber cloth application, working in small, two-inch square sections at a time. Apply firm, consistent downward pressure, moving back and forth along the direction of the scratches to gently level the microscopic ridges of the plastic, restoring beautiful polycarbonate clarity without causing structural thinning.
The most critical mistake to avoid during this restorative step is using heavy-duty automotive rubbing compounds or abrasive toothpastes, which often contain harsh silicas that induce severe chemical damage prevention failures and ruin the plastic.
Always test your polishing compound on a small, hidden tab or underneath the lip of the bin first. Buff the area until the compound dries to a light, hazy residue, then immediately use a fresh, dry microfiber cloth to polish the section to a high shine.
The ultimate visual cue is a surface that allows you to read text clearly through the plastic from a distance of two feet away, confirming successful acrylic plastic restoration.
Step 5: High-Clarity Rinsing, Drying, and Re-Staging
The final step requires the complete removal of all polishing residues and cleaning agents to prevent future hazing. Rinse the bins thoroughly under lukewarm, running tap water for at least two minutes, ensuring that every trace of soap and polish is washed away from the joints and handles.
Once rinsed, do not allow the plastic to air-dry, as tap water minerals will precipitate out of the droplets, creating new hard water spots that complicate your cloudiness troubleshooting efforts. Instead, immediately dry the entire bin inside and out using a clean, ultra-absorbent microfiber towel.
An issue to watch out for during drying is static electricity buildup, which naturally occurs when dry microfiber rubs against acrylic plastic. A high static charge will instantly pull ambient dust and pet hair right out of the air and onto your newly polished bins.
To avoid this, use light, dabbing motions during the final dry, or perform the task in a humid environment like a bathroom. Once completely dry, inspect the bins one final time for any missed spots. Re-insert the crystal-clear drawers gently back onto their refrigerator tracks, successfully completing your comprehensive fridge maintenance routine.
Pro-Tips for Long-Term Clarity Maintenance
To elevate your appliance care, implement a defensive strategy against future staining by deploying a thin layer of specialized carnauba wax or a food-grade mineral oil directly onto the clean plastic walls.
Applying a microscopic layer of oil using a precise microfiber cloth application fills in sub-microscopic pores before food spills can settle into them. This invisible barrier ensures that accidental drips from acidic fruit juices or condiments pool up on top of the barrier rather than etching into the material, serving as excellent preventative plastic care.
Another expert hack for advanced cloudiness troubleshooting involves dealing with stubborn hard water mineral haze. If your baking soda soak leaves behind a chalky white residue, it means you are dealing with concentrated calcium carbonate scale. Treat this specific issue by dampening a cloth with a 1:1 mixture of distilled white vinegar and warm water, then drape the wet cloth directly over the white scale for 15 minutes.
The mild acid breaks down the mineral bonds without causing any structural chemical damage prevention issues, clearing the path for easy rinsing.
Finally, always manage the microclimate inside your crisper drawers by utilizing adjustable humidity sliders correctly. High humidity settings trap condensation against the plastic walls continuously, which accelerates the leaching of plasticizers and promotes localized cloudiness over time.
Keeping the vents slightly open allows adequate airflow, keeping the environment dry enough to preserve polycarbonate clarity while keeping your produce fresh. This simple adjustment reduces the frequency of intensive interventions required in your overall deep-cleaning guide.
Product Recommendations for Pristine Bin Restoration
To achieve professional-grade results during your acrylic plastic restoration process, utilizing the correct tools is paramount. Standard kitchen dish soaps often fall short when dealing with deeply embedded oily films, which is why substituting them with a specialized, residue-free formula is highly recommended.
For the absolute best outcome in your fridge maintenance routine, we highly recommend utilizing the Novus Plastic Clean and Shine Set. This kit features distinct, non-toxic formulas tailored specifically for both superficial cloudiness removal and deep scratched surface repair.
It contains no harsh solvents, making it one of the safest food-safe cleaning agents available for maintaining long-term polycarbonate clarity without risking chemical etching.
Novus 7100 Plastic Polish Kit – 8 oz. Bottles (PC-10, PC-20, PC-30)
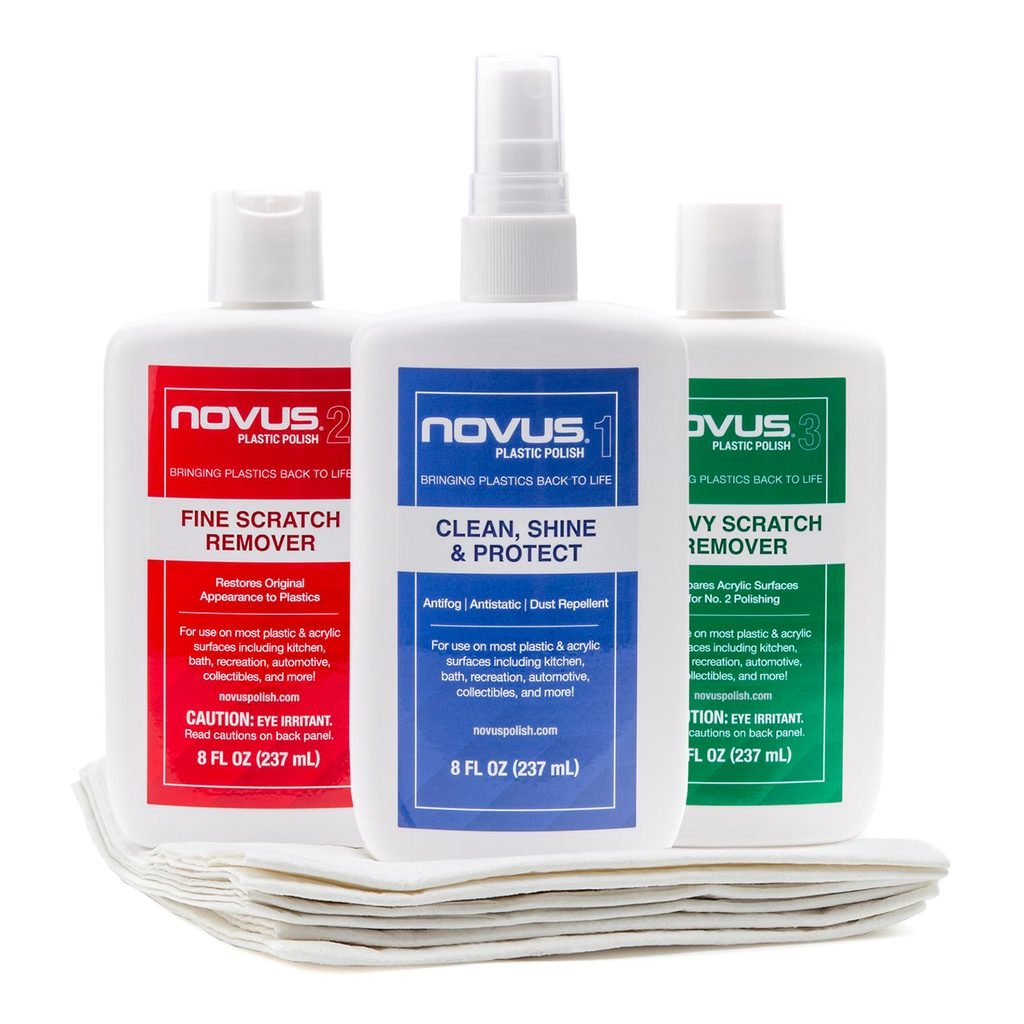
The ultimate three-step restoration system designed to eliminate deep scratches, haze, and abrasions from almost any plastic surface. Bring cloudy or damaged plastics back to life with professional-grade clarity and a showroom shine.
The Novus Plastic Polish Kit features three specialized formulas that seamlessly work together to clean, shine, and restore severely faded or scratched acrylics, plexiglass, and polycarbonate surfaces. It’s the go-to solution for extending the life of your plastic goods without the premium cost of replacing them.
In addition to the correct chemical treatments, your physical cleaning tools dictate the success of your preventative plastic care. Standard paper towels can actually contain rough wood fibers that introduce fine scratches during use, making proper material selection essential.
To guarantee scratch-free results during your microfiber cloth application phases, pairing your cleaner with the Chemical Guys Premium Grade Microfiber Towels is highly recommended.
These towels feature an ultra-soft, silk-banded edge that provides superior chemical damage prevention while lifting away stubborn polishing residues during your comprehensive deep-cleaning guide execution.
Chemical Guys Premium Grade Microfiber Towels (Bulk 50-Pack)
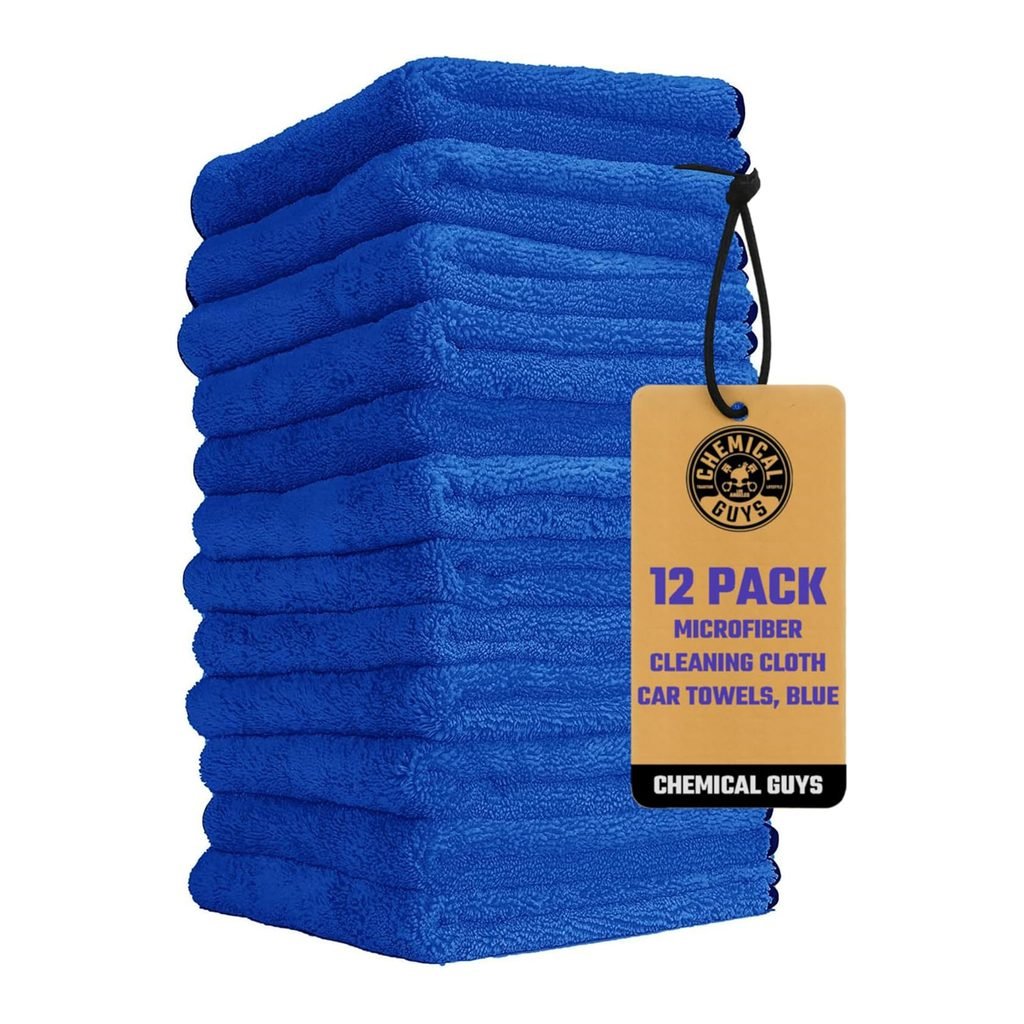
The ultimate bulk solution for scratch-free detailing, offering unmatched softness and professional-grade durability across all surfaces.
Achieve a flawless, swirl-free finish on your vehicle with this premium 50-pack of microfiber towels, engineered to trap dirt and absorb moisture effortlessly without linting or scratching. Whether you are wiping down paint, cleaning glass, or detailing interiors, these versatile cloths deliver showroom-quality results every time.
Safety & Care Guidelines
Executing a successful restorative process requires a strict adherence to safety protocols to protect both the user and the appliance’s manufacturer warranty. Many high-end refrigerator manufacturers explicitly state in their documentation that the use of unauthorized chemical solvents, abrasive powders, or extreme thermal environments will void the warranty on all interior shelving and trim components.
Therefore, prioritizing chemical damage prevention by using only approved, non-toxic agents is not just a recommendation—it is a legal and financial safeguard for your appliance investment. Always review your specific appliance manual before initiating any deep-cleaning guide procedures to ensure compliance with their proprietary material constraints.
Physical safety is equally important when handling large, awkwardly shaped polymer components. When clear bins are wet and covered in slippery food-safe cleaning agents, they become difficult to grip and prone to dropping, which can cause them to shatter or chip.
Always wear high-traction, latex-free cleaning gloves to maintain a firm grip during the washing and rinsing phases. Furthermore, ensure your workspace is well-ventilated if you are working with specialized compounds during an acrylic plastic restoration session. Keeping windows open or running a kitchen exhaust fan prevents the buildup of airborne particulates during the manual buffing phases.
Finally, protecting the structural integrity of the plastic requires strict temperature management. Introducing cold plastics directly to hot water, or attempting to accelerate the drying process with handheld hair dryers or heat guns, will induce severe thermal stress.
This stress alters the molecular configuration of the polymer, permanently destroying polycarbonate clarity and causing the plastic to warp or crack along its load-bearing joints. Allow natural ambient air to dictate the drying timeline, augmented only by a gentle, lint-free microfiber cloth application to safely lift away surface moisture without triggering physical or thermal degradation.
👉 View the Hoojo 8-Piece Set on Amazon
Preventive Blueprint for Long-Term Maintenance
Maintaining pristine transparency across your refrigerator interiors requires shifting from a reactive cleaning mindset to a proactive, defensive maintenance strategy.
Incorporating a systematic approach to preventative plastic care into your household routine ensures that superficial films never have the opportunity to bond with the polymer surface.
By intercepting potential hazards before they cause physical or chemical etching, you eliminate the need for labor-intensive scratched surface repair sessions down the road.
The following blueprint outlines the necessary operational steps to establish a permanent defense system for your clear storage components:
- The Weekly Micro-Wipedown Routine: Dedicate five minutes during your weekly grocery restock to perform a targeted microfiber cloth application dampened with warm, distilled water across all shelf surfaces.
This rapid intervention removes fresh, highly acidic food drips from citrus, berries, or condiments before they can chemically etch the underlying material. Catching these residues early is the most effective form of chemical damage prevention, preserving the native gloss and preventing the slow onset of a milky, degraded appearance. - Decoupled Environmental Conditioning: Never place warm leftovers or unsealed, steaming containers directly onto clear plastic shelving. The localized heat and humidity emissions can compromise the plasticizers within the polymer matrix, initiating structural hazing.
Always allow hot storage dishes to cool completely on the counter, or place them exclusively on tempered glass shelves, keeping your clear drawers reserved for cool, dry, or properly ventilated produce to maintain optimal polycarbonate clarity. - Proactive Microclimate Calibration: Calibrate your crisper drawer humidity sliders based on the specific respiration rates of the produce stored within.
Excessively high humidity settings create constant, stagnant condensation pools along the plastic walls, accelerating hard water mineral precipitation and triggering complex cloudiness troubleshooting challenges. Keep vents slightly open to encourage minimal, consistent airflow that prevents moisture stagnation while keeping vegetables crisp. - Strategic Sacrificial Barriers: Utilize ultra-thin, clear, food-safe silicone liners along the bottom floor of your heavy-use bins.
These liners act as a sacrificial barrier, absorbing the mechanical friction caused by heavy jars or rolling produce. When debris accumulates, simply remove and wash the liner independently, keeping the primary plastic bin entirely isolated from mechanical wear and eliminating the root causes of scratch-induced hazing. - Bi-Monthly Mineral Neutralization: Every 60 days, integrate a gentle mineral neutralizing bath into your established fridge maintenance routine.
A brief, ten-minute submerge in a highly diluted solution of water and mild food-safe cleaning agents lifts away invisible, microscopic hard water scale before it crystallizes into a stubborn, opaque film, ensuring your components look like they just rolled off the factory showroom floor permanently.
Frequently Asked Questions (FAQs)
Can I use rubbing alcohol to sanitize and clear up cloudy refrigerator plastic bins?
Absolutely not. Using rubbing alcohol, isopropyl solutions, or ammonia-based window sprays is a catastrophic error in chemical damage prevention.
Acrylic and polycarbonate plastics are highly sensitive to strong alcohols and solvents; exposing them to these chemicals causes a destructive structural reaction known as “crazing.” This process creates a dense network of thousands of microscopic fractures beneath the surface of the plastic, completely destroying polycarbonate clarity permanently.
Once a polymer experiences crazing from improper solutions, it cannot be fixed via standard acrylic plastic restoration or a simple microfiber cloth application. Stick exclusively to mild, approved food-safe cleaning agents like baking soda and gentle dish soaps during your regular fridge maintenance routine to ensure the plastic remains structurally sound and perfectly clear.
How do I know if my bin cloudiness requires simple washing or deep scratched surface repair?
Distinguishing between surface residue and physical structural damage is a core component of effective cloudiness troubleshooting. To diagnose the state of your bin, execute the initial steps of our deep-cleaning guide by giving the plastic a thorough soak in warm water mixed with mild food-safe cleaning agents, followed by a gentle wipe-down.
Once the bin is dry, take it into a well-lit room and run your fingertips across the hazy zones. If the surface feels completely smooth to the touch but still looks milky when light hits it, you are dealing with a dense field of micro-abrasions that scatter light.
This scenario indicates that you must transition to specialized scratched surface repair protocols, using fine polishing compounds and a methodical microfiber cloth application to level out the microscopic ridges and successfully restore the plastic’s original transparency.
Are commercial glass cleaners safe for restoring clarity to cloudy crisper drawers?
No, commercial glass cleaners should never be introduced to your refrigerator’s clear polymer components. Most standard glass cleaners rely heavily on ammonia, vinegar concentrations, or industrial surfactants designed strictly for non-porous tempered glass.
When applied to acrylic, these ingredients strip away the material’s built-in UV stabilizers and defensive coatings, leaving the plastic highly vulnerable to accelerated environmental yellowing and cloudiness. To practice proper preventative plastic care, you must avoid these items entirely.
Instead, rely on a dedicated fridge maintenance routine built around mild, additive-free soaps. If you must use a commercial product, ensure it is specifically rated for high-clarity optical polymers, guaranteeing total safety and long-term structural protection for your delicate appliance interiors.
Why did my refrigerator bins turn cloudy immediately after running them through the dishwasher?
When refrigerator bins are placed in a dishwasher, they are subjected to a destructive combination of extreme thermal shock, highly alkaline detergents, and intense drying heat.
Refrigerator plastics are engineered to remain stable in cold, humid environments; they cannot withstand the high temperatures of a dishwasher’s water coils, which easily exceed the thermal distortion point of clear acrylic.
This exposure causes the polymer chains to misalign, resulting in immediate, uncorrectable warping and severe, milky cloudiness throughout the material. This structural failure cannot be remedied by any deep-cleaning guide or scratched surface repair technique.
Hand-washing with lukewarm water and a soft towel is an uncompromisable rule of preventative plastic care and general appliance longevity.
What should I do if hard water minerals have left a permanent chalky white crust on my shelving tracks?
A permanent chalky white crust indicates advanced calcium and magnesium scale buildup, a common issue addressed in comprehensive cloudiness troubleshooting. To dissolve this crust safely without causing structural damage, avoid scratching it off with knives or abrasive pads.
Instead, saturate a soft towel with a mild, diluted solution of distilled white vinegar and warm water, then drape it directly over the mineral scale for 20 minutes. The mild acid will gently break down the crystalline mineral matrix without triggering a chemical damage prevention failure.
Once the scale has softened into a paste-like consistency, use a targeted microfiber cloth application to wipe the residue away completely. Follow up with a thorough rinse to complete your acrylic plastic restoration process.
Conclusion
Successfully mastering how to clean cloudy refrigerator plastic bins requires a careful blend of material science, patient execution, and the right tools. Haziness, surface etching, and fine abrasions don’t mean your kitchen components are ruined; they simply highlight the need for a more precise care routine.
By steering clear of rough, abrasive scrubbing pads, avoiding harsh household chemicals, and consistently using a gentle microfiber cloth application, you can reverse years of cosmetic wear and tear safely.
Ultimately, learning How to Clean and Restore Cloudy Scratched Refrigerator Plastic Bins Safely allows you to protect your kitchen investments and maintain a sparkling, hygienic food storage environment.
Incorporating these expert steps into your regular fridge maintenance routine guarantees that your clear acrylic elements keep their exceptional polycarbonate clarity and structural integrity. Treat your appliance components with the specialized care outlined in this deep-cleaning guide, and enjoy a beautifully clear, organized refrigerator for years to come.
Leave a Reply